Artist Watch: Street Art

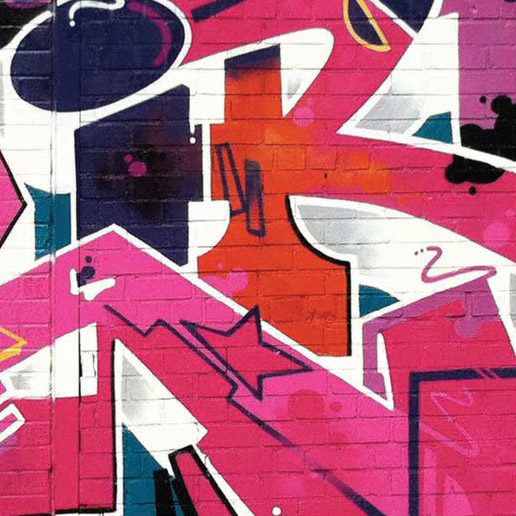
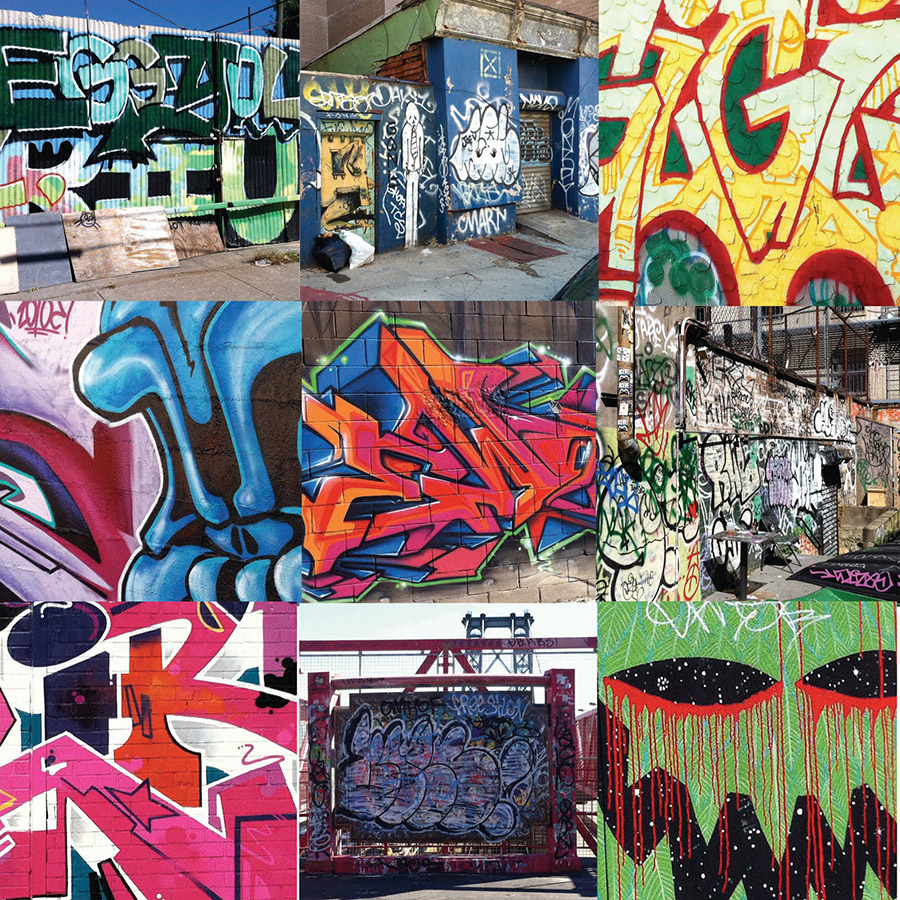
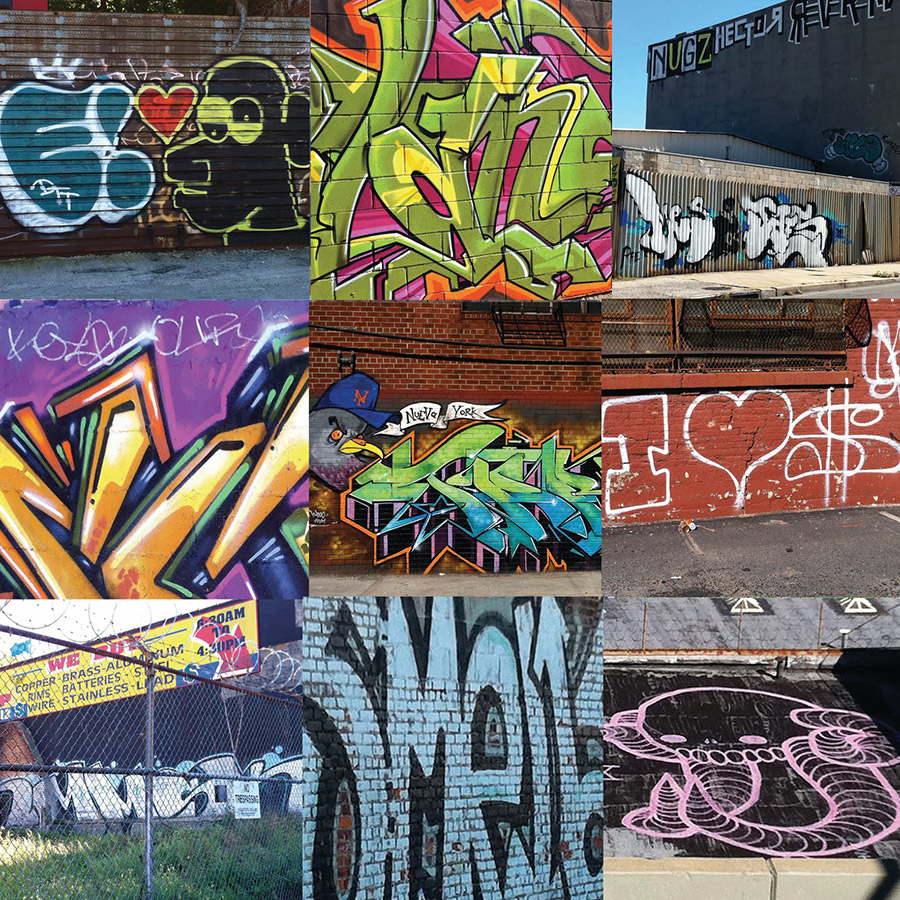
Been very much into street art these days.
Here are a few snapshots from my excursions so far…

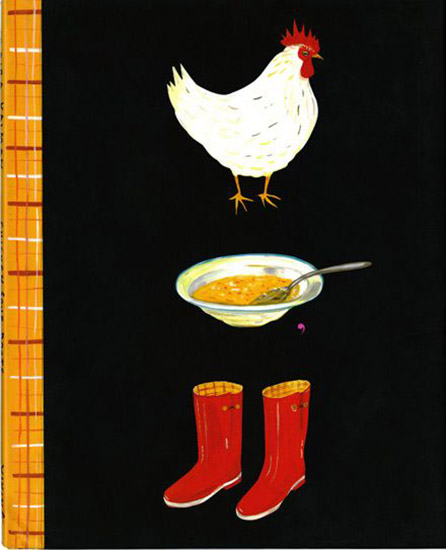
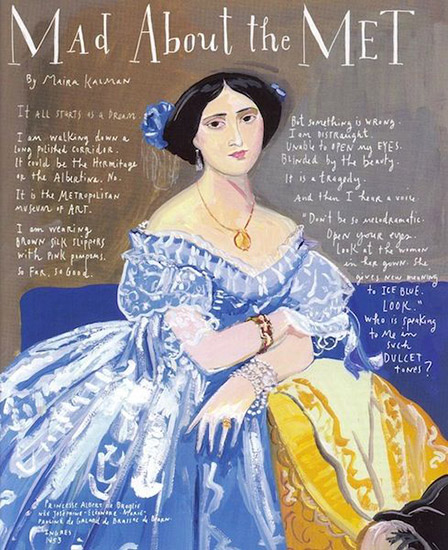
Artist Watch: Maira Kalman

Maira Kalman’s work is extensive.  She has written and illustrated children’s books, created The New Yorker Magazine covers, and many many more pieces.  Her paintings and sense of color are exquisite and seem to be alive!

Artist Watch: Dana Tanamachi

Without knowing it, you have probably seen some of Dana Tanamachi’s work out and about. She is originally from Texas, but now lives in Brooklyn and is a full time custom chalk letterer! Her work has been on magazines and catalogs (West Elm, Oprah, etc), and in stores! I just had to share her wonderful pieces of art with you all! To see more of Dana’s work click the link here.
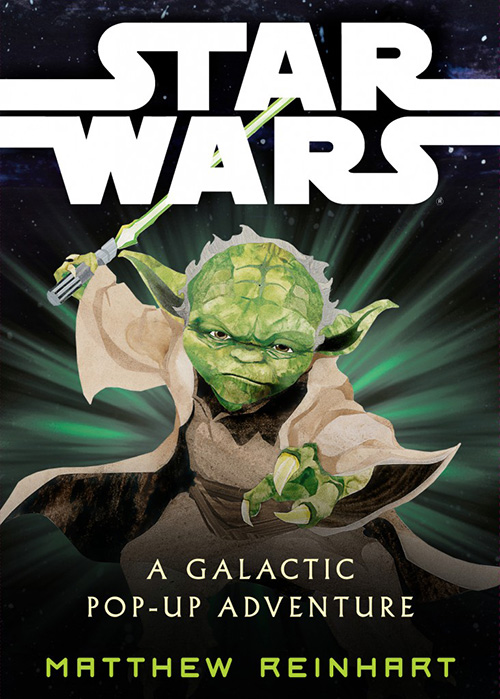
Artist Watch: Tom Whalen

Tom Whalen is an astoundingly talented illustrator, designer and werewolf hunter with a true love for the characters he depicts in his work, including some of my very own favorites – like Decepticon Communicator Soundwave, the evil sorceror Skeletor and the mute ninja commando Snake Eyes.

A limited edition of the two prints pictured here will be available from Thursday, October 11 through Sunday, October 14, 2012 at New York Comic Con booth 1681. Bold, colorful, inspiring and expressive – he shares my interests in super hero comic books, transforming toy robots and the complete domination of the Universe (kidding on that last one… maybe). After the Zombie-pocalypse when the robots inevitably take control, you can be assured Tom Whalen will be the official artist of Earth’s new metallic overlords!

Artist Watch: Tao Nyeu

‘Wonder Bear’ by Tao Nyeu is a really fantastic children’s book I found at Barnes & Noble recently.  The book takes you through a delightful journey with two children, a bear, and other animals!  Even though there may not be words, the pictures tell the whole story.  And a picture is worth a thousand words.  Check out more of her work here!

Artist Watch: Alli Coate

Alli Coate

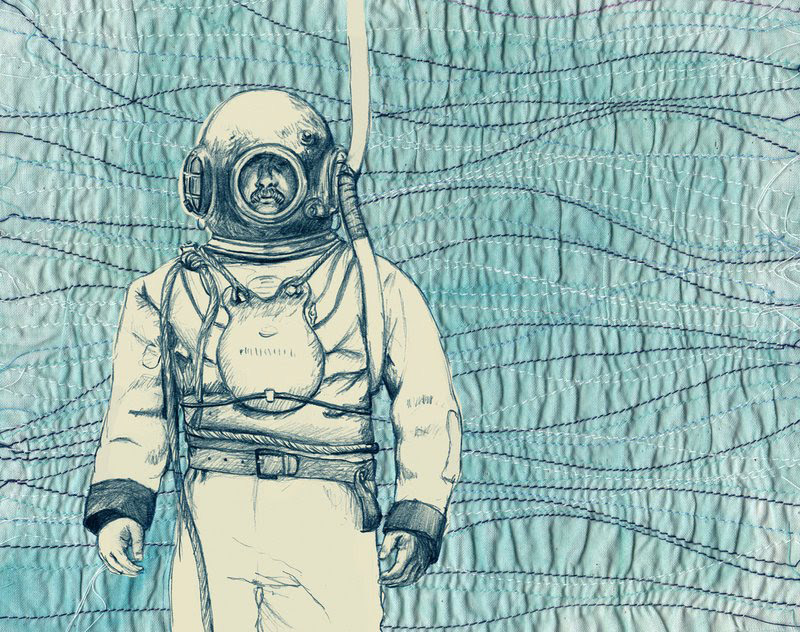
Within the studio, we are always looking towards other art for inspiration.  I found Alli Coate through one of these searches.  Coates is a Rhode Island based illustrator, and her art work is a combination of illustration and applique/sewing techniques.  I really love the playfulness of her style– it’s so tactile and she uses the fabric patterns to set the mood for the pieces.  Check out more of her work at her website.
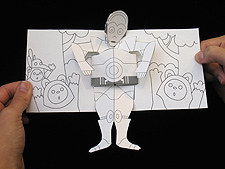
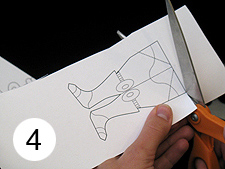
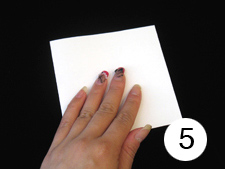
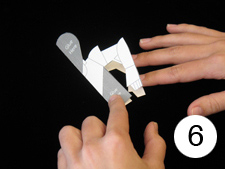
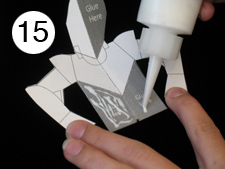
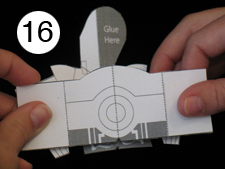
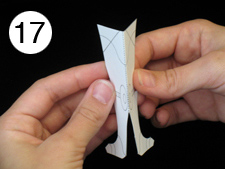
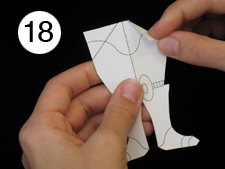
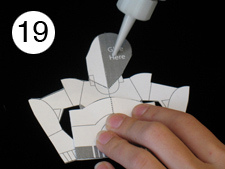
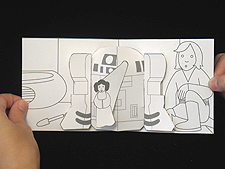
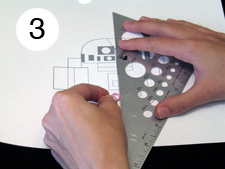
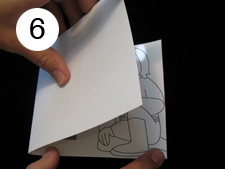
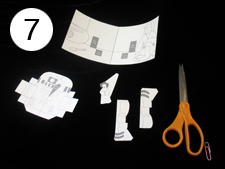
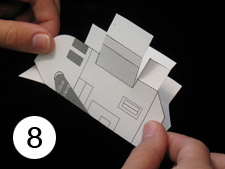
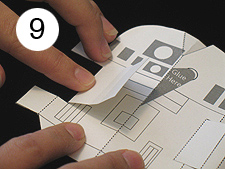
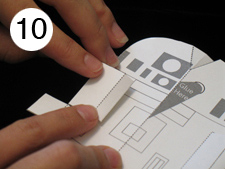
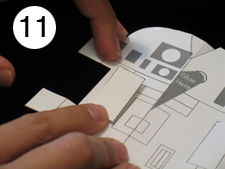
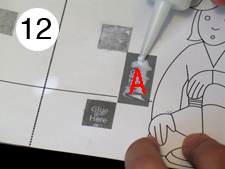
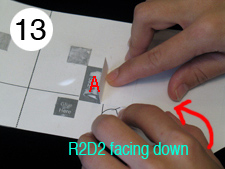
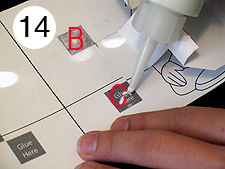
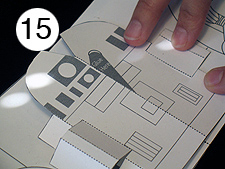
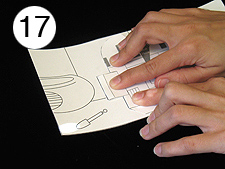
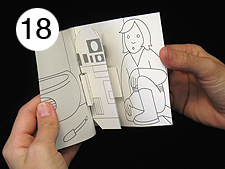
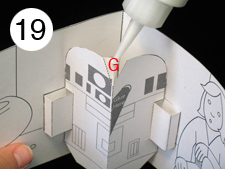
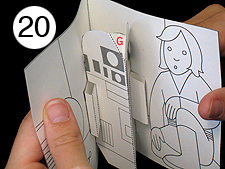
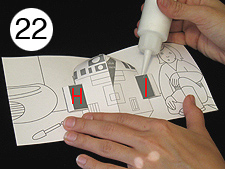
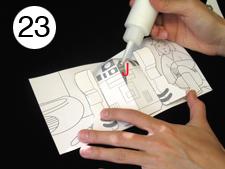
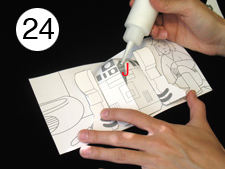
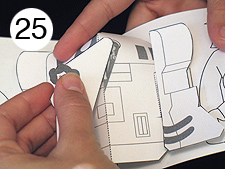
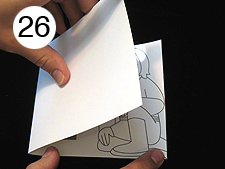
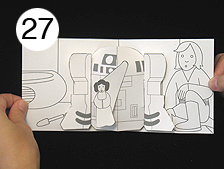
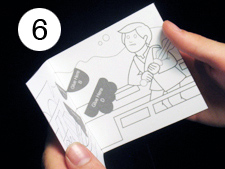
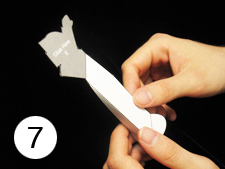
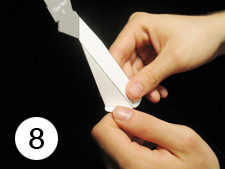
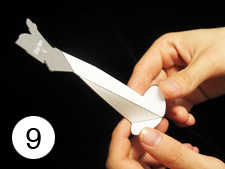
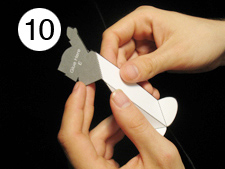
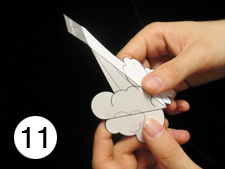
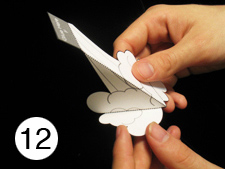
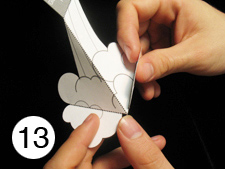
DIY Pop-Up: R2-D2

For this DIY Pop-Up you will need:

  • Cardstock or heavy construction paper
  • Scissors
  • Ruler
  • Paper clip, or ballpoint pen that has run out of ink, or a knitting needle
  • Crayons, colored pencils, markers

Instructions

1 Download the PDF templates and print out at 100% size (no scaling) on a heavy paper, such as cardstock.
2 Color all of your pieces with crayons or markers before scoring and cutting.

3 Using a ruler as a guide, take the rounded end of a paper clip and press along the dotted lines of the pop-up pieces and card.
4 Carefully cut out the pop-up pieces and card following the solid, black lines.
5 When you get to the top of R2-D2’s head, carefully cut on the solid black line into the center of his head.

6 Take your card, fold it in half and set it aside.
7 You should have 5 pieces total including the card.
8 Take your R2-D2 main body piece and fold it in half as shown. Place it back to its original position.

9 Now fold your R2-D2’s side tabs marked “D”, “F”, and then “E” on its first dotted line.
10 Continue folding the next dotted line on the same tab as shown.
11 Continue folding the last dotted line on the same tab as shown. Repeat the same three Steps to the opposite side tab “A”, “B” and “C”.

12 Apply a small amount of glue in area marked “Glue Here A.”
13 Line up the tab over “Glue Here A.” [Note: R2-D2’s back is facing you on this Step.]  Press firmly and let the glue dry.
14 Now place a small amount of glue in “Glue Here B” and “Glue Here C”.

15 Line up the tabs so that “B” and “C” are glued over areas “Glue Here B” and “Glue Here C.” [Note: Once the tabs are glued down, flip R2-D2 over, press firmly and let the glue dry.
16 Now apply glue to the other side on “Glue Here D”, “Glue Here E” and “Glue Here F”.
17 Line the tabs over their matching glue areas. Press firmly and wait for the glue to dry.

18 Close and open the card to crease well.
19 Fold the small triangle at the top of R2-D2’s head to the inside and apply a small amount of glue to the area marked, “Glue Here G”.
20 Start to close the card and carefully tuck the small triangle to the inside before you press firmly. Close the card completely and let the glue dry.

21 Open the card; it should now look like this.
22 Apply glue to area “Glue Here H” and “Glue Here I”.
23 Take R2-D2’s right leg and place it over “Glue Here H”. Do the same with his left leg on the other side for “Glue Here I”.

24 Apply glue to “Glue Here J”.
25 Take the Princess Leia Hologram piece and line it over “Glue Here J” and wait for the glue to dry, as this is very important. You’re almost done...
26 After the glue dries, close your card and press firmly.

27 Open your card! You’ve now completed your R2-D2 pop-up!

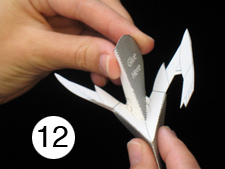
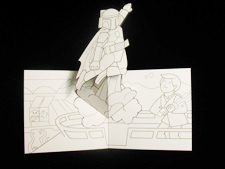
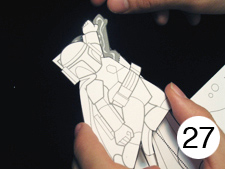
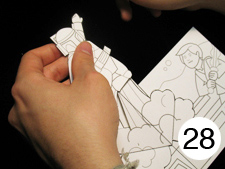
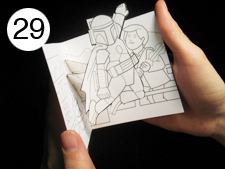
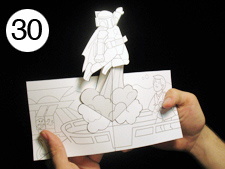
DIY Pop-Up: Boba Fett
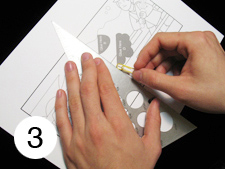
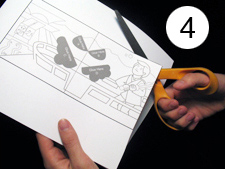
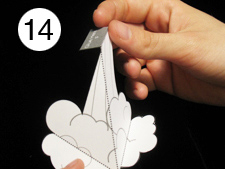
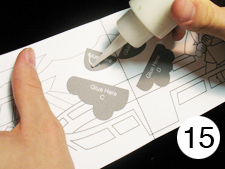
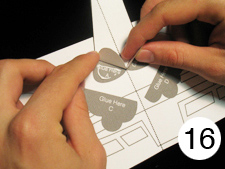
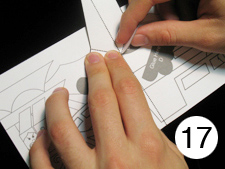
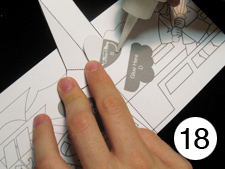
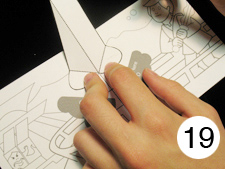
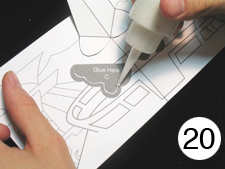
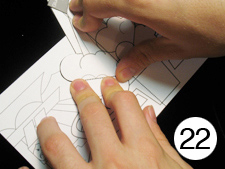
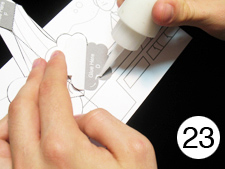
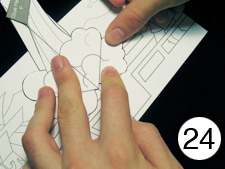
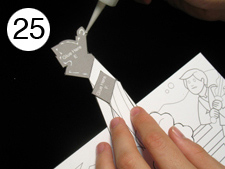
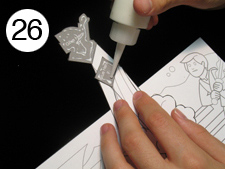
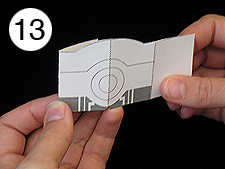
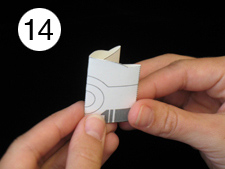
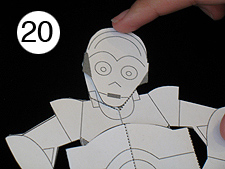
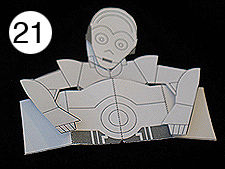
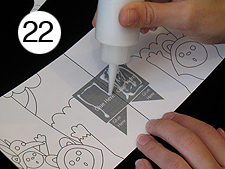
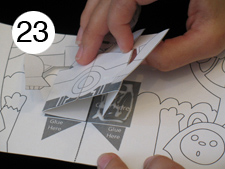
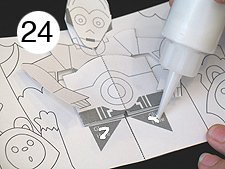
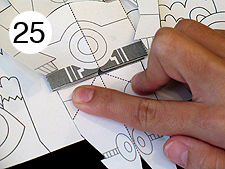
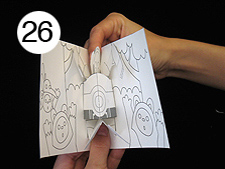
For this DIY Pop-Up you will need:

  • Cardstock or heavy construction paper
  • Scissors
  • Ruler
  • Paper clip, or ballpoint pen that has run out of ink, or a knitting needle
  • Crayons, colored pencils, markers

Instructions

1 Download the PDF templates and print out at 100% size (no scaling) on a heavy paper, such as cardstock.
2 Color all of your pieces with crayons or markers before scoring and cutting.

3 Using a ruler as a guide, take the rounded end of a paper clip (or a ballpoint pen that has run out of ink) and press along the dotted line on the center of the card. Repeat for the all the dotted lines.
4 Carefully cut out all of Boba Fett’s pieces and card following the solid, black lines.
5 You will now have these four pieces scored and cut out.

6 Take the base page (card) and fold it towards you along the solid dotted line. Crease well and unfold.
7 Now take the piece marked with “Glue Here E”. Fold the piece away from you down the center dotted line. Crease well and unfold.
8 Now fold the lower left tab up towards you. Crease well and unfold.

9 Now fold the lower right tab up towards you. Crease well and unfold.
10 Now fold the upper tab that is grey away from you. Crease well and unfold. Set the piece aside.
11 Pick up the piece marked “Glue Here F”. Fold the piece away from you down the center dotted line. Crease well and unfold.

12 Fold the lower left tab up towards you. Crease well and unfold.
13 Fold the lower right tab up towards you. Crease well and unfold.
14 Now fold the upper tab that is grey away from you. Crease well and unfold. Set the piece aside.

15 Take the base page and put glue in the grey shaped marked “Glue Here A”.
16 Pick up the piece marked “Glue Here E” and line up the lower left tab with “Glue Here A”.
17 Press the tab down firmly and let the glue dry.

18 Put glue in the grey shape marked “Glue Here B”.
19 Line the lower right tab up with the grey shape “Glue Here B’. Press the tab down firmly and let the glue dry.
20 Now put glue in the grey shape marked “Glue Here C”.

21 Pick up the piece that is marked “Glue Here F”. Line up the lower left tab with the grey shape “Glue Here C”.
22 Press the tab down firmly and let the glue dry.
23 Now put glue in the grey shape marked “Glue Here D”.

24 Line up the lower right tab with the grey shape “Glue Here D”. Press the tab down firmly and let the glue dry.
25 Now put glue in the grey shape marked “Glue Here E”.
26 Now put glue in the grey shape marked “Glue Here F”.

27 Pick up Boba Fett and line his head and his arm up with “Glue Here E”. It will match up perfectly.
28 Once Boba Fett is matched up with “Glue Here E”, press firmly and let the glue dry.
29 Now that the glue is completely dry, slowly close the pop-up.

30 And open the pop-up… SWOOSH! It’s your very own Boba Fett!

DIY Pop-Up: C3PO

For this DIY Pop-Up you will need:

  • Cardstock or heavy construction paper
  • Scissors
  • Ruler
  • Paper clip, or ballpoint pen that has run out of ink, or a knitting needle
  • Crayons, colored pencils, markers

Instructions

1 Download the PDF templates and print out at 100% size (no scaling) on a heavy paper, such as cardstock.
2 Color all of your pieces with crayons or markers before scoring and cutting.

3 Using the ruler as a guide, take the rounded end of a paper clip and press along the dotted lines of the pop-up pieces and card.
4 Carefully cut the pop-up pieces and card following the solid black lines. When you’re done, you should have 5 pieces total, including the card.
5 Take your card and fold it in half. Set the card aside for now.

6 Take your C-3PO main body piece and fold it in half.
7 Now fold both tabs “A” and “B” towards you as shown in the photo. Crease well.
8 Flip the body piece over and fold the tabs “A” and “B” away from you. Crease well.

9 Take C-3PO’s head “D” on the main body piece and crease it towards you.
10 Now fold and crease C-3PO’s head “D” away from you.
11 Take his main body piece and push it back away from you so that the grey glue areas are in front of you.

12 Now push his head on the main body piece towards you. Set this piece aside for now.
13 Take his mid-section and fold the left tab “B” as shown away from you. Do the same to the other right “C” tab.
14 Fold the piece in half as shown. Unfold to its original position and set it aside.

15 Now take your C-3PO piece and apply a small amount of glue to the two areas marked “Glue Here A”.
16 Take your C-3PO mid-section and line up over “Glue Here A” so that the bottom edges of both pieces are straight on top of each other. Press firmly and let the glue dry. Set this piece aside.
17 Take the leg piece and fold it in half away from you.

18 Crease the corner tabs towards you starting with “E”, the left side of the leg. Repeat this Step on the right side marked “F”. Put it back to its original position and set this piece aside.
19 Now take C-3PO’s main body piece and apply glue to area “Glue Here D”.
20 Take his head and line it over “Glue Here D”. Press firmly and let the glue dry.

21 Place C-3PO’s arms in front of his body as shown here.
22 Apply glue to tab areas “B” and “C” on your card.
23 Align tab “B” and “C” directly over it’s corresponding “Glue Here B” and “Glue Here C”. Press firmly and let the glue dry. [Note: Tabs “B” and “C” will tuck under the mid-section.

24 Apply a small amount of glue to areas “Glue Here E” and “Glue Here F” on your card.
25 Take C-3PO’s legs and align them over “Glue Here E” and “Glue Here F”. Press firmly and let the glue dry.
26 Begin to carefully close your card. C-3PO’s main body piece will shrink inside his mid-section and his legs will swing up. Press firmly and let the glue dry.

27 Open your card! You’ve now completed your C-3PO pop-up!